Why Most Senior Exercise Lists Miss the Point
If you have searched for gentle movement for seniors at home, you have probably seen the same listicles: sit-to-stands, wall push-ups, chair marches, and a dozen other exercises. They are not wrong, but they are incomplete. What those lists rarely tell you is how to start safely, how to know when to push harder or back off, and how to turn movement into a habit you actually stick with. After years of working with older adults in their homes, I have learned that the biggest barrier is not physical ability - it is fear, confusion, and lack of a clear plan.
The good news is that you do not need a gym, special equipment, or a personal trainer. You need a simple framework that adapts to your energy on any given day. That framework is what I call the Progressive Movement Ladder. It is a three-tier system - seated, supported standing, and freestanding - that lets you start exactly where you are and move up or down as your body demands. This approach addresses the real gaps I see in most online advice: progression, modification, safety cues, and the mind-body connection that keeps you motivated.
Most people don't realize that the fear of falling is often a bigger obstacle than the physical limitation itself. The Progressive Movement Ladder is designed to rebuild confidence step by step, so you never feel rushed or unsafe.
Before You Move: Setting Up a Safe Home Space
Before we talk about exercises, let us talk about the room you will be moving in. A cluttered or poorly lit space can turn a simple chair exercise into a fall risk. I have visited countless homes where a loose rug or a trailing power cord nearly caused an accident. The environment is the foundation of safe movement, and it is the first thing I check with every client.
Here is a quick safety checklist to run through once before you start and then again every few weeks:
- Clear a path: Move furniture, plants, and pet bowls out of the area where you plan to move. Aim for a circle of at least 6 feet in diameter.
- Remove rugs: If you have throw rugs, either remove them or secure them with double-sided tape. Slipping on a rug edge is one of the most common home fall causes.
- Check the chair: Use a sturdy dining chair or a home office chair with a stable base. Avoid wheeled chairs. The seat height should allow your feet to rest flat on the floor with your knees at a 90-degree angle.
- Wear proper footwear: Socks with grips are fine, but bare feet on hardwood can be slippery. If you wear shoes, choose flat, closed-toe sneakers with a nonslip sole.
- Lighting: Make sure the area is well lit. Use a night light if you exercise in the early morning or evening.
Once your space is safe, you are ready to move. But before you attempt a single exercise, I want you to practice one simple thing: breathing. Inhale through your nose for four counts, exhale through your mouth for six. This is not just relaxation - it actually signals your nervous system to lower stress hormones and improves your balance. For a deeper dive into breathwork, see our beginner guide to simple home breathing exercises.
The Progressive Movement Ladder: A 3-Tier System
The ladder has three rungs: seated, supported standing, and freestanding. Each tier is a complete workout in itself, but you can also mix and match. The key is to choose the tier that matches your current energy and confidence level on that particular day. Some days you might feel great and do the freestanding tier. Other days you might have a low energy day or a bit of stiffness, and you drop down to the seated tier. That is not a failure - it is smart self-management.
How do you know which tier to start with? If you have not been active for a while, or if you have any balance concerns, start with the seated tier. If you can get out of a chair without using your hands and can stand for 30 seconds without swaying, you can try the supported standing tier. Freestanding is for when you feel steady on your feet and want a challenge. Always have a chair or counter within arm's reach, even in the freestanding tier, just in case.
Tier 1: Seated Movement
Seated exercises are the safest place to begin. They strengthen your core, improve circulation, and keep your joints moving without the risk of falling. I have seen people with severe arthritis and post-surgical restrictions make enormous progress just by sitting in a sturdy chair and doing these moves daily.
Here are four foundational seated exercises:
- Seated March: Sit tall with your feet flat. Lift your right knee toward your chest, then lower it. Alternate legs for 30 seconds. Keep your back straight - do not lean back.
- Seated Side Bend: Reach your right arm overhead and gently lean to the left. Hold for two breaths, then switch. This stretches your side body and improves spinal mobility.
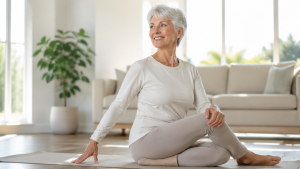
- Seated Torso Twist: Place your right hand on the back of the chair and your left hand on your right knee. Gently twist to the right, looking over your shoulder. Hold for three breaths, then switch.
- Seated Heel and Toe Raises: With your feet flat, lift your heels off the floor, then lower. Then lift your toes. Repeat for 10 reps each. This strengthens your ankles, which is crucial for balance.
When I first started guiding clients through these exercises, I made the mistake of rushing the motion. I learned that slow, deliberate movements are far more effective. Aim for a two-second lift and a three-second lower. Breathe out as you lift, breathe in as you lower. If you feel sharp pain, stop immediately. Mild discomfort is normal, but sharp pain is a stop signal.
Tier 2: Supported Standing
This tier uses a chair back or a countertop for support. It builds leg strength and challenges your balance while giving you something to grab if you wobble. The transition from seated to standing is the single most important movement for seniors, so this tier focuses on that pattern.
Start with these three exercises:
- Sit-to-Stand with Support: Place a chair against a wall. Sit on the edge with your feet hip-width apart. Lean forward slightly, press through your heels, and stand up using the chair's armrests or a nearby counter for support. Then sit back down slowly. Do 5-8 reps. This is the number one exercise for seniors at home because it directly combats the muscle weakness that leads to falls.
- Calf Raises at the Counter: Hold the counter with both hands. Rise up onto your toes as high as you can, then lower. Do 10 reps. This strengthens your calf muscles, which are essential for walking and balance.
- Side Leg Raise with Support: Hold the counter with one hand. Lift your other leg out to the side, keeping your toes pointing forward. Lower slowly. Do 8 reps on each side. This targets the hip abductors, which prevent you from swaying side to side.
Here is a tip that took me years to learn: always keep your toes pointed forward, not out. Many people angle their feet outward thinking it gives more stability, but it actually places uneven stress on the knees and hips. Practice standing with your feet parallel and your weight evenly distributed.
Tier 3: Freestanding
Once you can do the supported exercises without holding on for dear life, you can try freestanding moves. These are the most challenging because they remove the external support, forcing your body to rely on its own balance. But you still keep a chair or counter nearby - not to hold, but to catch you if needed.
These three exercises are my go-to for this tier:
- Heel-to-Toe Walk: Stand with your right foot directly in front of your left, touching heel to toe. Walk forward slowly for 10 steps, then back. Keep your arms out to the sides for balance. This mimics the narrow base of support you need when walking on uneven ground.
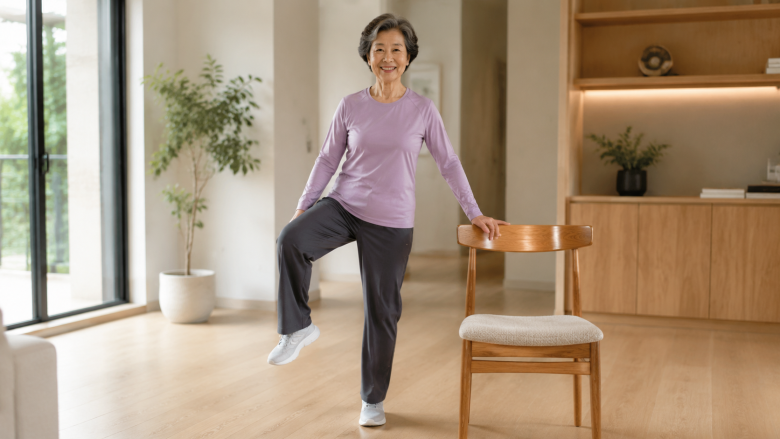
- Single-Leg Stand: Stand behind a chair with your hands lightly resting on the back. Lift your right foot off the floor, bending your knee. Hold for 10-15 seconds, then switch. Do not grip the chair - just use it as a safety net. As you improve, you can hold on with one finger, then no hands.
- Tandem Stand: Stand with your feet aligned, one directly in front of the other, like a tightrope walker. Hold this position for 20-30 seconds. Focus on a fixed point at eye level to steady yourself.
What nobody tells you about freestanding exercises is that you will feel wobbly at first - and that is good. Wobbling is your body learning to make tiny adjustments. If you feel dizzy or lightheaded, sit down immediately and take a few slow breaths. Do not try to push through it.
How to Scale Intensity Up and Down Based on Your Day
Your energy and pain levels fluctuate from day to day, and your movement routine should honor that. This is where most exercise programs fail - they give you a fixed plan and tell you to stick with it. But a fixed plan does not account for a bad night's sleep, a stressful phone call, or the joint pain that flares up after a long car ride.
I use a simple traffic-light system with my clients. Green means you feel good and can do the freestanding tier with maybe an extra rep. Yellow means you have some stiffness or fatigue, so you drop down to the supported standing tier, or you do fewer reps in the freestanding tier. Red means you are having a high-pain day or feel unwell - you do the seated tier only, or you just do the breathing exercises. There is no shame in a red day. The point is to keep moving, not to hit a specific rep count.
To make this concrete, here is a decision matrix you can apply every session:
- Did you sleep at least 6 hours last night? If no, start with the seated tier and reassess after 5 minutes.
- Are you experiencing any sharp pain when you move? If yes, stop and consult your healthcare provider. If it is just dull ache, proceed but reduce the range of motion.
- Can you stand from a chair without using your hands? If no, stay in the seated or supported tiers. If yes, you can try freestanding.
- Do you feel anxious about falling today? If yes, choose the supported tier and place a chair in front of you as well as behind you.
I remember a client named Margaret who had a strict routine of 20 minutes of standing exercises. One day she called me, frustrated because she could barely lift her leg. I told her to do the seated version instead. She was skeptical but tried it. Within a week she was back to standing. The lesson: respecting your body's signals is not a setback - it is a strategy for long-term consistency.
The Mind-Body Connection: Breathing and Mindfulness in Movement
Gentle movement is not just about the physical act - it is about the quality of your attention. When you breathe deeply and focus on the sensation of each movement, you activate the parasympathetic nervous system, which lowers your heart rate and reduces the stress response. This is why I always start every session with two minutes of diaphragmatic breathing. Inhale for four counts, exhale for six. This simple practice has been shown to improve balance and reduce the fear of falling, according to a study in the Journal of Geriatric Physical Therapy.
You do not need to meditate for an hour. Just bring your awareness to the movement. Feel the floor under your feet. Notice the stretch in your calf. If your mind wanders, gently bring it back. This is mindfulness in motion.
If you want a structured way to incorporate breathwork into your daily life, check out our daily 10-minute movement routine, which pairs simple exercises with breathing cues. That article is a great companion to this one, especially if you prefer short sessions.
Building the Habit: Overcoming Fear and Staying Consistent
You can know all the exercises in the world, but if you do not practice them, they are useless. The hardest part of gentle movement for seniors at home is not the physical effort - it is the psychological barrier. Fear of falling, lack of motivation, and the belief that "it is too late" can stop you before you start.
Here are four strategies that have worked for my clients and for me:
- Anchor your movement to a daily cue: Do your exercises right after brushing your teeth in the morning, or before your afternoon cup of tea. The cue becomes a trigger, so you do not have to decide or negotiate with yourself.
- Start with 2 minutes: Do not aim for 30 minutes. Aim for 2 minutes of seated marching or breathing. Once you are moving, you will often continue for 10 minutes. The hardest part is the first step.
- Keep a simple log: Write down the date, the tier you did, and how you felt. This is not about tracking reps - it is about noticing patterns. You will see that you have more energy on certain days, and you can plan accordingly.
- Use the "but" technique: When you hear yourself say, "I don't want to move today," add "but I can do one seated march." Then do that one. The momentum carries you.
I also want to address the fear of falling directly. According to the Centers for Disease Control and Prevention, one in four Americans aged 65 and older falls each year, and falls are the leading cause of fatal and nonfatal injuries among older adults. But here is the thing: the risk of falling actually decreases when you strengthen your legs and practice balance. Every time you do a sit-to-stand, you are not just exercising - you are building the muscle memory that will catch you when you trip on a curb or a throw rug.
One of my clients, 82-year-old Frank, was terrified of standing on one leg. He had not fallen in years, but the fear was paralyzing. We started with him holding the counter with both hands and lifting one foot just a few inches off the floor. After two weeks, he could hold on with one hand. After a month, he could stand unassisted for 10 seconds. The progress was slow, but each small win chipped away at his fear. Now he tells me he actually looks forward to his balance work.
A Sample Daily Routine for a 70-Year-Old at Home
If you are 70 or older and wondering what you should be doing every day, here is a realistic, sustainable template. This is not a rigid prescription - it is a flexible guide that you can adjust based on the traffic-light system we discussed.
Morning (5-10 minutes): After getting out of bed, do a few seated stretches while sitting on the edge of the bed: neck rolls, shoulder shrugs, and ankle circles. Then do the seated march for 30 seconds. This gets your blood flowing without putting stress on your spine.
Mid-morning (10-15 minutes): This is your main movement block. Choose one tier based on your energy. If you feel good, do the freestanding exercises. If you are a bit stiff, do the supported standing tier. Always include the sit-to-stand, because it is the most functional movement for daily life.
Afternoon (5 minutes): Take a short walk around your home - from the bedroom to the kitchen and back. Focus on your posture: roll your shoulders back, lift your chest, and take long strides. If you can, step outside for fresh air.
Evening (5-10 minutes): Before bed, do a gentle evening stretch routine. This can include a seated forward fold, a gentle side bend, and some leg stretches. You can follow our gentle evening stretch plan for relaxation if you want a guided sequence.
This routine takes about 30 minutes total, but it is broken into small chunks that do not feel overwhelming. The key is consistency, not intensity. Even 10 minutes a day has been shown to improve mobility and reduce stiffness, according to a National Institute on Aging fact sheet.
Common Mistakes and How to Avoid Them
After a decade of coaching seniors, I have seen the same mistakes repeated. Here are the top three, and how to fix them:
Mistake 1: Holding your breath. People often hold their breath when they exert effort, especially when lifting or standing. This spikes your blood pressure and can make you dizzy. Always exhale on the effort. If you find yourself holding your breath, slow down and count your breaths out loud.
Mistake 2: Gripping the chair too tightly. In the supported standing tier, I often see people white-knuckling the chair. That grip actually shifts your weight forward and makes your balance worse. Instead, rest your fingertips lightly on the surface. You should feel supported, not suspended.
Mistake 3: Pushing through sharp pain. There is a difference between muscle fatigue and sharp, shooting pain. If you feel a sudden sharp pain, stop immediately. Do not "walk it off." That is your body telling you something is wrong. Consult your doctor or physical therapist before continuing.
I made the mistake of ignoring sharp pain myself when I was younger - I was doing a side lunge in my 40s and felt a pop in my knee. I kept going, and I regretted it for months. Now I tell everyone: pain is a stop signal, not a challenge to overcome.
When to Stop and Seek Help
Gentle movement should never cause injury, but sometimes underlying conditions need medical attention. If you experience any of the following during or after exercise, stop and contact your healthcare provider:
- Chest pain or shortness of breath
- Dizziness that does not resolve within a few minutes
- Severe headache or blurred vision
- Pain that radiates down your arm or into your jaw
- Sudden weakness in any limb
These could be signs of a cardiovascular issue or a neurological problem. It is always better to be safe. Also, if you have a chronic condition like osteoporosis, heart disease, or recent surgery, get clearance from your doctor before starting any new exercise program.
Final Thoughts: Start Where You Are
The Progressive Movement Ladder is not about reaching the top rung and staying there. It is about moving with confidence, listening to your body, and building a sustainable habit. Some days you will be at the top; other days you will be at the bottom. Both are okay.
I challenge you to do one thing today: sit in a sturdy chair, do a seated march for 30 seconds, and notice how you feel. Then do it again tomorrow. That is all it takes to begin. The gentle movement for seniors at home that works is the movement you actually do, day after day, with awareness and self-compassion.
If you want a short, guided session to get started, our beginner guide to 5-minute home workouts is a perfect companion. The ladder is your map - now take the first step.