Why Your Hips Feel Tight (and Why 'Just Stretch' Makes It Worse)
If you've been told to hold a pigeon pose or sink into a deep hip flexor stretch to loosen up, and instead you feel a sharp pinch or your hip seizes up even more, you're not alone. I've worked with dozens of clients - from desk-bound professionals to osteoarthritis patients - who came to me after failed attempts at aggressive stretching. The standard advice misses a critical truth: tight hips are often a nervous system protection response, not just a muscle length problem. When you force a stretch, your brain interprets the tension as a threat and tightens the very muscles you're trying to release.
The gentle way to stretch tight hips is to work with your nervous system, not against it. That means using small, pain-free movements, supported positions, and your breath to signal safety. This approach - I call it micro-mobility - is especially effective for anyone who finds traditional hip openers too aggressive, whether due to age, injury, or chronic stiffness. In this guide, I'll show you exactly how to do it, step by step.
What Most People Don't Realize About Tight Hips
When I first started teaching yoga, I made the classic mistake of pushing students into deep hip openers. One older woman, a retired nurse with a hip replacement, nearly cried in pain during a pigeon pose. I had assumed her tightness was just 'normal' and that she needed to push through it. I was wrong. Her hip was tight because her joint lacked stability, and the muscles were splinting to protect it. Forcing the stretch only increased her pain and made her more guarded.
The thing nobody tells you about tight hips is that the feeling of 'tightness' is often a protective muscle spasm, not a true shortness of the muscle fibers. Prolonged sitting, prior injuries, or even emotional stress can keep your hip flexors and rotators in a constant low-grade contraction. A gentle approach that respects this protective mechanism is not just more comfortable - it's more effective in the long run. Research from the National Institutes of Health shows that low-load, prolonged stretching can improve flexibility without triggering the stretch reflex, but only when the intensity stays below your pain threshold.
The Micro-Mobility Framework: 3 Principles for Gentle Hip Relief
Micro-mobility is a method I developed after years of working with clients who couldn't tolerate standard stretching. It rests on three principles that you'll apply to every movement in this article:
- Principle 1: Pain is a stop sign, not a challenge. If a stretch feels like a pinch, a sharp pull, or a jolt, back off immediately. You're looking for a sensation of mild tension or 'release,' never pain.
- Principle 2: Small oscillations beat long holds. Instead of holding a static position for 30-60 seconds, you'll move in and out of the range of motion in tiny, rhythmic pulses (2-3 cm of movement) while breathing slowly. This keeps the nervous system calm and prevents the stretch reflex from firing.
- Principle 3: Support is your friend. Use pillows, straps, walls, and even a chair to offload your body weight. The less you have to stabilize, the more your hip muscles can actually relax.
These principles turn every stretch into a conversation with your body, not a battle. In the next sections, I'll walk you through four supported, prop-based stretches that put these principles into practice.
Your Gentle Hip Stretch Toolkit: Props and Setup
Before we start, gather a few items you probably already have at home. You don't need fancy equipment - just things that make you comfortable.
- A firm cushion or folded blanket (for under your head or pelvis)
- A yoga strap, belt, or long scarf (for leg support)
- A wall or a sturdy chair (for leverage and support)
- A small towel or pillow (to roll under your knee or lower back)
Set up in a quiet space where you won't be interrupted. Wear loose clothing that doesn't constrict your hips. And if you can, do these stretches after a warm shower or a few minutes of gentle walking - warm muscles are more pliable and less likely to spasm.
Stretch 1: Wall-Assisted Hip Flexor Release (No Floor Required)
Most hip flexor stretches require you to kneel, which is impossible for many people with knee pain or balance issues. This version uses a wall for support and lets you control the intensity with your foot position.
How to do it
Stand facing a wall, about an arm's length away. Place your hands on the wall at shoulder height for balance. Step your right foot back so your toes are pointing toward the wall and your right heel is lifted. Keep your left foot forward, knee slightly bent. Now, gently tuck your pelvis under (imagine pulling your tailbone down) and lean your torso slightly forward, keeping your back straight. You should feel a mild stretch in the front of your right hip. Do not push into pain.
Instead of holding still, begin to pulse: shift your weight forward and back by just 2-3 centimeters, like a tiny rocking motion. Breathe in as you rock back, breathe out as you rock forward. Do this for 10-15 pulses, then switch sides. The wall gives you stability, so your hip muscles can actually let go. If you feel a pinch in the front of the hip, step your back foot further away from the wall to reduce the angle.
What can go wrong: If you lean too far forward, you'll compress the lumbar spine and feel a sharp pain in the lower back. Keep your spine neutral and your ribs stacked over your pelvis. This is a micro-movement, not a lunge.
Stretch 2: Pillow-Supported Figure-Four (A Gentle Pigeon Alternative)
Pigeon pose is a classic hip opener, but for many people, it's too intense on the outer hip and knee. The pillow-supported version lets you get the same external rotation without the joint compression.
How to do it
Lie on your back with both knees bent and feet flat on the floor. Cross your right ankle over your left knee, making a figure-four shape. Now, take a firm pillow or a folded blanket and place it under your right knee - this is the key. The pillow supports the weight of your leg so your hip muscles don't have to work to hold the position. You should feel a gentle pull in your right outer hip, but it should be mild.
Once you're comfortable, begin small oscillations: gently press your right knee toward the wall (away from your body) for 2 seconds, then release for 2 seconds. Keep the movement tiny - just a few centimeters. Breathe deeply into your belly. Do 10-12 repetitions, then switch sides.
Why this works: The pillow removes the need for your hip muscles to stabilize, allowing the deep rotators to relax. The oscillation also stimulates mechanoreceptors in the joint, which tell your brain that movement is safe and pain-free.
Most people don't realize that the figure-four on your back is safer than the floor version because your lower back is fully supported. If you have lower back issues, keep both shoulders on the floor and place a small towel under your head if needed.
Stretch 3: Strap-Assisted Leg Lowering (For Tight Adductors and Hamstrings)
Tight inner thighs (adductors) often contribute to hip stiffness, but most adductor stretches involve sitting with the soles of your feet together and pressing your knees down - which can strain the medial knee. This version uses a strap to control the angle and support your leg.
How to do it
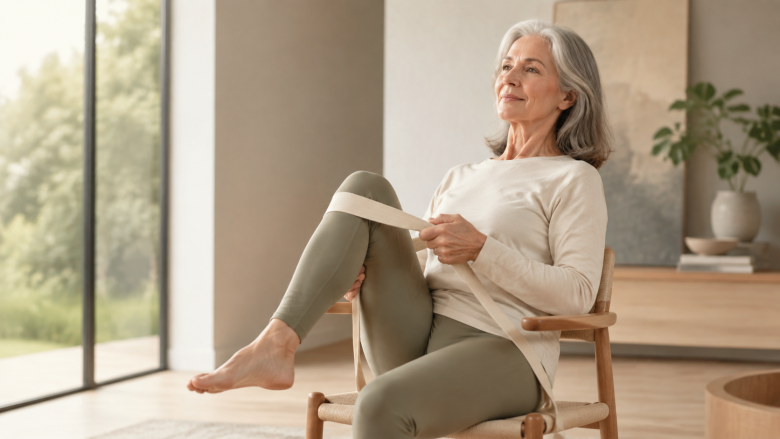
Lie on your back with both legs extended. Loop a strap around the ball of your right foot, holding the ends in your left hand. Keep your right leg straight but not locked. Slowly lift your right leg up toward the ceiling, using the strap to support the weight. Stop when you feel a mild pull in the back of your thigh or inner groin - not pain.
Now, instead of holding your leg up, lower it just 5 degrees (about 10 cm) and then lift it back up. This oscillation is the micro-movement. Move slowly, with your breath: inhale as you lift, exhale as you lower. Do 8-10 reps, then switch sides.
The strap is crucial because it allows you to relax your leg muscles completely. If you try to hold your leg up with your own strength, your hip flexors will tighten and you'll lose the stretch. Let the strap do the work.
What can go wrong: If you feel a sharp pain in the sciatic nerve (down the back of the leg), you've lifted too high. Lower the leg so the sensation is a dull muscle stretch, not a nerve tingle.
Stretch 4: Seated Spinal Twist with Hip Release (For Outer Glute and Lower Back)
This one targets the deep gluteal muscles that often cause 'hip pain' that actually radiates from the lower back. It's done seated so it's safe for people with balance issues.
How to do it
Sit on the edge of a sturdy chair, feet flat on the floor. Place your right hand on your left knee and your left hand on the back of the chair. Gently twist your torso to the left, looking over your left shoulder. You should feel a stretch in your right outer hip and lower back. Keep your sit bones heavy on the chair.
Now, add a micro-movement: without twisting further, press your left knee gently into your right hand (isometric contraction) for 3 seconds, then release and let your body relax into a slightly deeper twist for 2 seconds. Repeat this 5-6 times. The isometric contraction followed by relaxation is a technique called post-isometric relaxation, which helps muscles release more deeply without force.
This stretch is excellent for people who spend hours sitting. As we covered in our guide to how to stand up and stretch hourly at work, taking these micro-breaks throughout the day can prevent the hip tightness from building up in the first place.
How to Breathe for Nervous System Safety
Breathing is not just a nice add-on - it's the core of the micro-mobility approach. Your breath directly controls your autonomic nervous system. When you exhale slowly, you activate the parasympathetic 'rest and digest' response, which tells your muscles to release. When you hold your breath or inhale sharply, you trigger the sympathetic 'fight or flight' response, which increases muscle tension.
For every stretch in this guide, use this breathing pattern:
- Inhale through your nose for 4 seconds, filling your belly.
- Exhale through your mouth (or nose) for 6-8 seconds, sighing out.
- Move only on the exhale - that's when your muscles are most relaxed.
- If you feel any pain, stop and just breathe for a few cycles before deciding to continue.
This exhale-focused breathing is the same principle behind the gentle evening stretch plan we've put together for winding down. The more you practice this breath-movement connection, the easier it becomes for your hips to let go.
A 10-Minute Gentle Hip Routine You Can Do Right Now
Here's a complete routine that combines the four stretches above, plus a few extra micro-movements. Do this every day or every other day, and you'll notice a difference within two weeks. The key is consistency over intensity.
Routine Structure
- Warm-up (1 min): Stand or sit and gently circle your hips in both directions, 5 circles each. Keep it small and slow.
- Wall-Assisted Hip Flexor Release (2 min): Do 10-15 pulses on each side as described above.
- Pillow-Supported Figure-Four (3 min): Do 10-12 oscillations on each side. Rest for 30 seconds between sides.
- Strap-Assisted Leg Lowering (2 min): Do 8-10 reps on each leg, moving with your breath.
- Seated Spinal Twist (2 min): Do 5-6 isometric-relaxation cycles on each side.
Finish with a few deep breaths, lying on your back or sitting quietly. Notice how your hips feel - often there's a sense of 'space' or warmth that wasn't there before.
If you have a chronic condition like arthritis or a recent hip injury, check with your healthcare provider before starting any new movement routine. But for most people, this gentle approach is safe and can be adapted to your exact tolerance level.
When to Avoid Stretching (And What to Do Instead)
As gentle as this approach is, there are times when stretching is not appropriate. If you experience any of the following, skip the stretch and seek professional guidance:
- Sharp, shooting pain that radiates down your leg (may indicate a nerve issue)
- Pain that worsens with movement, not improves
- Joint instability - feeling like your hip is 'giving way'
- Recent fracture or acute injury (wait for clearance from a doctor)
- Signs of infection or inflammation (fever, swelling, redness)
In these cases, stretching could aggravate the underlying issue. Instead, focus on gentle range-of-motion exercises that don't load the joint, such as lying down and moving your leg in small circles. A physical therapist can give you a personalized plan that addresses the root cause of your tightness.
The Truth About 'Hip Opening' and What Actually Works
Many popular yoga classes and fitness videos promise to 'open your hips' with deep lunges and intense pigeon poses. But after years of working with people who have tight hips, I've learned that this aggressive approach often backfires. The hips are a weight-bearing joint, and they need stability as much as mobility. Forcing a stretch can stretch out the ligaments that hold the joint together, leading to instability and even more pain.
What actually works is a gradual, respectful increase in range of motion, combined with strengthening the muscles around the hip. The micro-mobility approach does exactly that: by moving in small, pain-free oscillations, you're teaching your nervous system that this range is safe. Over time, the brain allows more length, and your hip moves more freely without fear.
One client of mine, a 68-year-old man with severe hip osteoarthritis, was told he needed a hip replacement. He couldn't touch his shoes without pain. We started with just the pillow-supported figure-four and the strap-assisted lowering, doing 5 minutes every morning. After three months, he could bend down to tie his shoes without pain. His doctor was surprised. The point is not that stretching cures arthritis - it's that gentle, consistent movement can improve function and quality of life, even when the joint is compromised.
Incorporating Micro-Mobility Into Daily Life
The best way to prevent tight hips is to move regularly throughout the day. If you sit at a desk, set a timer to stand up and do a few of these micro-stretches every hour. In our article on how to stand up and stretch hourly at work, we share a simple checklist that takes less than 2 minutes. Add the wall-assisted hip flexor release to that routine, and you'll notice less stiffness by mid-afternoon.
Also, consider pairing your gentle hip stretches with a relaxing evening wind-down. The bedtime stretch routine we've developed includes many of these same movements, done even slower and with more emphasis on breath. Stretching before bed can improve sleep quality and reduce nighttime hip pain.
Common Mistakes to Avoid (Even When You're Being Gentle)
Even with a micro-mobility approach, it's easy to fall into habits that undermine your progress. Here are the most common mistakes I see:
- Moving too fast: Your oscillations should be slow and deliberate - think of a lazy pendulum, not a quick bounce.
- Holding your breath: If you catch yourself holding your breath, you're in a stress response. Stop and return to your exhale-focused breathing.
- Chasing the 'burn': A burning sensation is a warning sign of muscle fatigue or joint irritation, not a sign of a good stretch. Back off.
- Comparing to others: Your range of motion is unique. What feels like a tiny movement to you might be a full stretch for someone else. Honor your body.
- Skipping the support: If you feel like you're working hard to hold a position, add more pillows or a stronger strap. The goal is relaxation, not effort.
If you notice that a particular stretch consistently hurts or makes your hip feel worse the next day, stop doing it. Not every stretch is right for every body. The beauty of the micro-mobility approach is that you can adjust each movement to your exact needs.
Your 7-Day Gentle Hip Challenge
To help you put this into practice, I've created a simple 7-day challenge. Each day, commit to 10 minutes of the routine above (or a portion of it). Keep a journal of your pain levels and range of motion. Here's what to expect:
- Day 1-2: You might feel a little sore, but not painful. This is your nervous system adjusting to new movement patterns.
- Day 3-4: You'll notice that the stretches feel easier and your hips feel less 'locked up' by the end of the day.
- Day 5-7: You'll likely be able to move into a slightly deeper range without discomfort. Don't push further - just enjoy the progress.
After the week, take a day off and then reassess. Many people find that they want to continue because the gentle approach feels nurturing rather than punishing.
Final Thoughts: Gentle Is Not Weak
If you've been avoiding hip stretches because they hurt, or if you've been told to 'push through the pain,' I hope this guide gives you permission to be kind to your body. Gentle, micro-mobility work is not a cop-out - it's a smarter, science-backed way to improve mobility without injury. Your hips have been holding tension for a long time, and they deserve a patient, compassionate approach.
Start with just one stretch today. Use a pillow, a strap, and your breath. Move in tiny pulses. And notice how your body responds. That's the real art of stretching tight hips gently - not forcing, but listening.